Yr2 Week 8: Sentry Gun Progression
- Nov 26, 2015
- 3 min read

This week has been mainly spent refining my ideas as much as possible. I started off the week by looking at my basic block out in more depth. I looked at the silohuette of it, and realised that it was not as strong from the front as it was from the side, so spent quite a while doing paintovers of the silohuettes and then adjusting my block out to reflect this, until I came to a design where I was confident that it accurately reflected a lion and was easy to distinguish as a lion just from the silohuette. I refined featured such as the gap between the lions legs and stomach to emphasise the negative space, and also exagerrated the mane so it was very prominent in the silohuette. I also experimented a little with different heights and also widths, as I didn't want my lion to be too skinny or large. This way of working really helped me analyse the shape and form to produce the best outcome.

After I was pleased with the silohuette, I carried on further defining the blocked outed model. I decided that the body looked a little bit unbalanced and like a peanut, so from references began to refine the shape of the body and experimented with turbo smooth to add more topoloy. At one point I connected the head and the body to see if there was a way I could make the entire lion move to fire ammo, but decided against this idea. I also noticed the back leg of my lion was a little strange, as the lion is sitting on his hind legs, it should have been bent more, rather than looking fully extended, so I remodelled this area to reflect this.

After I was more pleased with the standard base model. I decided to start experimenting with how the lions head would move. I came to the conclusion that the base of the top part being flat caused many less clipping problems and allowed the head to move around a lot more freely, and even though this did not look too great, it was the best outcome I could find that still remained practical.
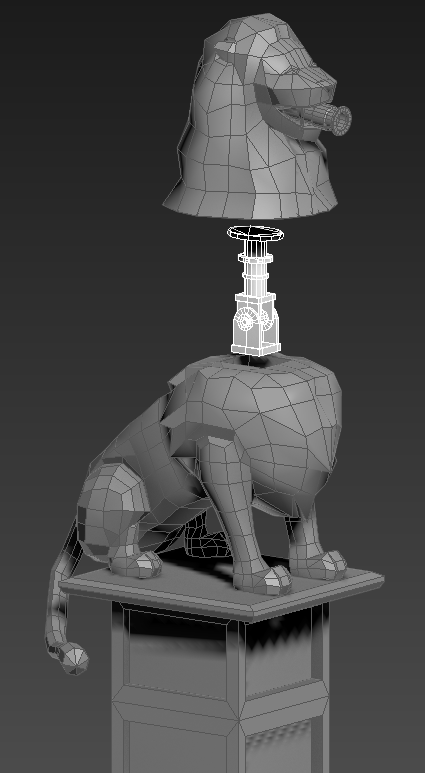
This is a quick screenshot of how my gun works - The head is attached to the horizontal yaw which is on a pivot which allows it to move forwards and backwards. The head itself rotates around vertically on top of the yaw. Although the Yaw is only seen when the head is moving, it is very important to the functionality of the gun.

I imported my block out into Zbrush and applied a matcap over the top of it and rendered it out to use for my paintover. As I began painting over my render, I noticed a few issues with my model, for example, my mane went too far back and surrounded too much of the legs, I also needed to make a few other slight changes such as defining the legs and back more, so I went back to max to fix these things which can be seen below.

Here I have corrected the issues I found whilst doing my paintover and applied smoothing groups correctly to my final low-poly block out, ready for my high-poly normal to be applied to it when it is done.

This image shows my low poly sentry gun untextured so far with wireframe. I have also included a dis-assembled version of it to show the different parts used in my gun.

After making the required changes to my model, I went back to my paintover. I also noticed that the perspective was in orthographic, so tried my best to fix this after completing my first paint over. I then went in to experiment with different values and colours, and found a simple light to dark gradient worked the best in this case.

This is the final iteration of the paintover. I am usure if this is yet the final concept, as I would like to produce a more detailed illustration labelling all of the machanisms in a more promotional way, but this is what I have come up with thus far.
I am hoping next week to be able to start developing my high-poly version in zbrush, and also making the parts all work correctly with the blueprints in engine, as I am yet to do this.
Comments