Yr2 Week2: PBR and Asset Modelling
- Oct 15, 2015
- 2 min read
Game Production
This week was spent mainly modelling the assets for the Film Room project. Our groups chosen scene for the film room is quite small and there aren't a whole lot of things which required modelling for our scene, so I found modelling the objects quite quick, and tried to spend time improving them and adding more detail where I could as our high tri limit allows us to experiment a bit more than previous projects that have been quite low poly briefs, even so, it has proven a little difficult to add large amounts of detail to non-organic objects which are quite blocky.
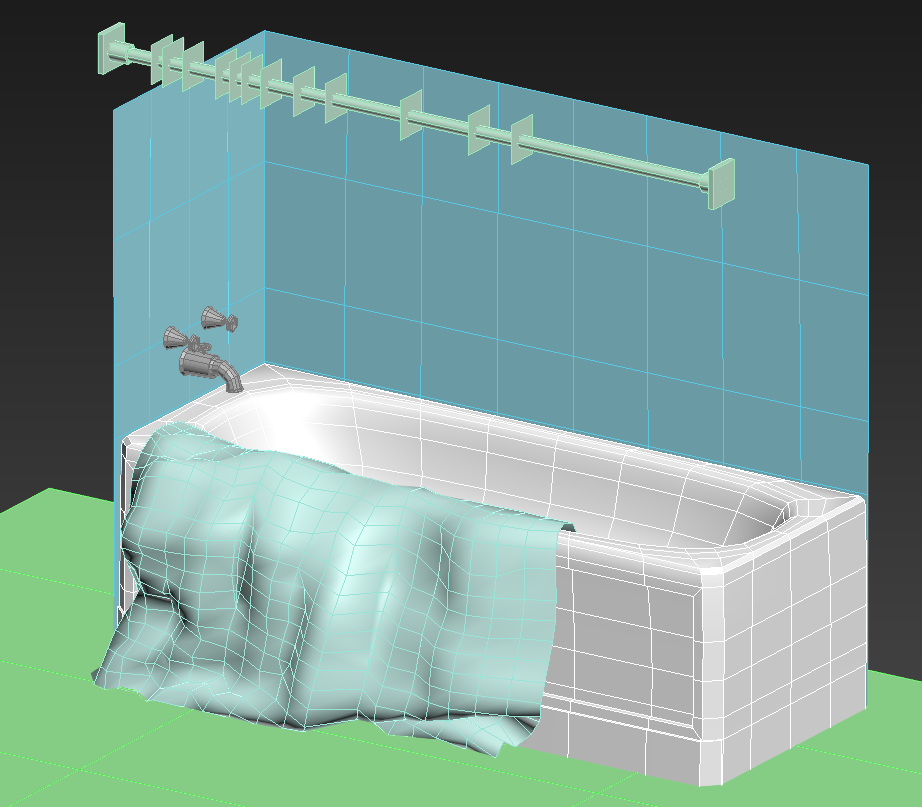
So far I have finished modelling
• Chest of drawers
• Vase and ashtray to go on top of the drawers
• Bath
• Bath taps/faucets
• Pulled down shower curtain
• Shower curtain rail
However a lot of these assets go together so I have modelled in the same scene, making it look like a little less.
Due to how quickly I managed to get through these, I volunteered to create any extra objects that were left over, and will now be creating a towel rack and mirror to go in the bathroom also, and will try my best with anything else that may need creating.
Here are some images of the models I have created so far:


I still need to add smoothing groups to the models and then begin unwrapping them all ready to be textured, but I feel like I am so far on track and I am quite pleased with the outcomes so far.
Visual Design
In visual design this week we learnt the basics of PBR - Physical Based Rendering, and learnt how create the materials Unreal Engine for different surface properties to create realistic looking materials for objects.
PBR allows you to add many different attributes to a material, such as roughness, metalness, specular and many others, making the materials react with light in a more realistic and accurate way in comparison to regular rendering methods.
We were given the exercise to create materials from provided textures and apply them to the below objects to achieve the material that they are labelled as.

As I hadn't done any form of PBR before, this was completely new to me, and it took a little while to figure out how all of the seperate elements are plugged in to the material, but it becomes quite simple once you understand what each element does. I have not yet experimented with more complex materials such as glass and water, but I hope to do these soon to push my understanding further.
Along with this, I would also like to have a go at creating my own maps for these and learn how to create roughness maps by hand and try to create some full materials using PBR, just to familiarise myself with the process further.
I think that this is an interesting way of rendering and will be quite useful during our film room project to create nice materials to compliment our scene.
Comments